Instructions for Use
Find out how to use various gadgets and how to adjust the height of your walking stick
Walking Stick Instructions
The list below is all the walking sticks and accessories we think there should be instructions for. Click on each link and be directed to that section to read online, or click on the PDF links to print them out instead.
The Ice Grip Ferrule -
Print PDFFolding Walking Sticks -
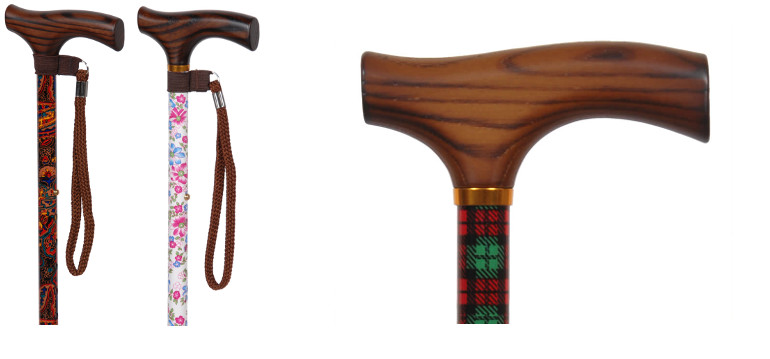
Print PDFHeight Adjustable Walking Sticks -
Print PDFFlipsticks -
Print PDFMulti Tipped Flipsticks -
Print PDFHiking Poles -
Print PDFQuad & Offset Walking Canes -
Print PDFShooting Sticks -
Print PDFReplacing the Rubber Ferrule (walking stick tip) -
Print PDFStickmaking Kit Instructions -
Print PDFThe Ice Grip FerruleFitting an Ice grip Ferrule to your Walking Stick
In the packet you will have the ice grip ferrule and two sets of screws, one long and one short.
1. Unscrew the screws and fit the ice grip around the tip of your walking stick so that the spikes fit under the existing rubber or steel ferrule.
The spikes should now be touching the ground.
2. Now tighten either the long or the short screws supplied, whichever fits according to the diameter of your walking stick.
3. When the spikes are not needed, squeeze the white handle together and turn the ice grip upside down so that the spikes are pointing up towards the stick handle and are flush against the stick shaft. Then release.
Folding Walking SticksAdjusting the height of your folding walking stick
1. Unscrew the collar in the top section of the shaft under the handle.
2. Push in the button.
3. Find height required by twisting the two shaft sections apart so that the button goes into the next hole, up or down.
4. When correct height is achieved, tighten the collar again. Please ensure this is fully tightened before use.
Folding and unfolding your folding walking stick
When you take your walking stick out of the pouch the four or five sections of the stick will all lock into place with a click. each section is held together by a stretchy cord that runs the length of the stick.
To fold up again, pull each section apart and hold together in the hands until the walking stick is put away in to a carry pouch or use a folding walking stick clip to hold it together.
Height Adjustable Walking SticksAdjusting the height of your adjustable walking stick
1. Unscrew the collar in the top section of the shaft under the handle.
2. Push in the button.
3. Find height required by twisting the two shaft sections apart so that the button goes into the next hole, up or down.
4. When correct height is achieved, tighten the collar again. Please ensure this is fully tightened before use.
FlipsticksFlipstick Operation Instructions
To convert the walking stick to a seat, depress the button on top of the stem, 'flip' into position and the seat will lock into place.
To return to a walking stick, depress the button that is now visible in the middle of the seat, 'flip' back and the handle will lock into place.
Folding Flipsticks
To unfold the flipstick - the sections will lock into place when taken out of the bag. A stretchy cord running through the stems makes each section lock together.
Check all stems have locked into place before use.
To fold back up, pull apart each section and fold into the carry case.
Adjusting the height of your adjustable flipstick
1. Unscrew the collar in the bottom section of the shaft near the tip (ferrule).
2. Push in the button.
3. Find height required by twisting the two shaft sections apart so that the button goes into the next hole, up or down.
4. When correct height is achieved, tighten the collar again. Please ensure this is fully tightened before use.
Multi Tipped FlipsticksPack away Folding Flipstick Instructions for order codes: 2103A, 2103B and 2111
Please read the following instructions for your pack away flipstick. You will find these instructions with your order when you receive it in the post.
To Open the Seat
1. Grasp black locking sleeve and pull down firmly
2. Tip-up the seat into a horizontal position. Ensure that the locking sleeve has fully engaged with the seat.
Height Adjustment
The height can be adjusted by pressing in the two spring buttons, sliding the inner tube to the desired length, ensuring that both buttons spring out into the required pair of holes.
Sitting on the Seat
Place the seat behind you with the base approximately 45c m (18 inches) away. Lean seat towards you and bend body back to meet it, place your feet approximately 45 cm (18 inches) apart to make a triangle with your stick.
Changing the Tips (Ferrule End)
Press in the toggle button at the tip at the stick and pull the end section off. You can now choose either the rubber ferrule tipped end or the spiked ferrule with ground plate end.
Caution: Single tube seat sticks are for those who can balance safely on the seat and form a stable tripod with their weight shared evenly between seat and feet. If you have a disability or condition which may affect your balance, e.g arthritis, multiple sclerosis or have had a hip replacement, always consult medical advice before use.
These pack away flip sticks are intended for use only as a one person seat. Do not use it for anything else.
Hiking PolesHow to Adjust the Height of your Hiking Poles
Inside each adjustment point on the hiking stick there is an "expander". Here, an internal split dowel expands and locks the poles into position when twisted clockwise. When twisted anti-clockwise , the dowel unlocks and the pole can be shortened or lengthened to the appropriate height. A half turn is all that is required to loosen the extending mechanism.
The lowest section should be fully extended to the "stop max" mark, and the pole then adjusted to the required height using the middle section.
CAUTION: Do not extend the hiking poles beyond the "stop max" mark.
Each hiking pole has a removable plastic basket that can be clicked on at the bottom of each pole to prevent the pole from sinking into soft ground
There is a small 'bite' taken out of each basket so that two poles can be held easily together when not in use.
How Long to Make your Hiking Poles
As the poles are fully height-adjustable, it is possible for every walker to find their ideal walking position. As a general guide, most walkers find the following arrangements most suitable for different types of terrain:
Walking on the flat:
The poles should be adjusted so that the walker's forearms are bent at an angle of 90 degrees to their body when stationary.
Walking uphill
The poles should be shortened so that they can be placed easily and comfortably in front of the body to allow for extra support and ease of movement.
Walking downhill
The poles should be lengthened so that the walker's posture remains upright rather than bent forward.
Walking on a transverse gradient
When walking across the side of a hill, lengthen the pole on the downhill side and shorten the pole on the uphill side. This will help to maintain balance and provide support.
Always check that your poles are completely locked before use.
Troubleshooting
In the event of the shaft sections being unscrewed too far, the locking expander dowel may be left "floating" in the upper shaft section. It can be retrieved by gently pushing the lower shaft completely into the upper shaft. Twisting the lower shaft clockwise for a couple of turns will then reunite the screw threads with the expander.
Quad & Offset Walking CanesAdjusting the Height of your Quad or Offset Walking Cane
1. Unscrew the collar at the base of the shaft by the feet.
2. Push in the button.
3. Find height required by twisting the two shaft sections apart so that the button goes into the next hole, up or down.
4. When correct height is achieved, tighten the collar at the base. Please ensure this is fully tightened before use.
Shooting SticksHow to Operate a Shooting Stick
We sell height adjustable and fixed length shooting sticks
The sling seat is released by un-popping the popper and pulling the handles down to make a seat.
The height is adjusted by unscrewing the wing nut completely off on the shaft and then you pull the shaft up or down until the required height is achieved.
Then push the screw back through the hole and tighten with the wing nut. Please ensure this is fully tightened before use.
The shooting sticks for use on soft ground, all have a ground plate above the spiked tip. Twist the ground plate to a horizontal position to prevent the stick from sinking into the ground.
Twist the ground plate back up to a vertical position for walking.
Replacing the Rubber Ferrule (walking stick tip)To replace a rubber ferrule (walking stick tip), rock the ferrule on your walking stick back and forwards to break the seal and pull off.
Please note: this can be difficult and we recommend someone strong removes the original ferrule).
The new ferrule is then simply pushed onto the bottom of the stick. To ensure the ferrule is tightly fitted, lean on the stick.
Please regularly check ferrule for wear and tear and replace when base rings show wearing.
Stick making Kit InstructionsTo fit the handle to the shank, use a 10 mm spanner to gently wind the coach bolt into the handle approximately 30 to 40 mm deep. You must be careful not to over tighten this bolt as if could result in the handle splitting.
Then, measure 25 mm from the bottom of the handle and cut the coach bolt off there. 25 mm length is all that is needed, if you leave it longer in anticipation of a more secure fixing, you will split the shank.
Using fast setting Epoxy glue, liberally coat the handle recess and the shank top. Then screw the two together and wipe off any excess glue.
Using some wire wool, rub the inside of the ferrule taking care there are no sharp edges. Having checked the length of shank you require, either reshape the taper on the shank or use the preformed shape. Check the fit of the ferrule to its full depth on the shank.
Epoxy glue the ferrule to the shank and when dry you can wire wool the exterior to expose the brass finish.
Sand and prepare your stick to the level you require and finish with Danish oil or varnish as you prefer. Danish oil provides a matt finish while varnish can be gloss or matt.
Enjoy making your own stick with this lovely kit and if you get inspired and want to get creative and make more of your own then we will be more than happy to sell them for you on our website.

Follow us: